
On this page
How to Configure Azure AD OAuth2 Authentication for Grafana Using Helmfile

Introduction
Azure AD OAuth2 authentication allows Grafana to use Azure Active Directory (Azure AD) as an identity provider. This means users can log in to Grafana using their Azure AD credentials. The authentication process involves several steps to ensure secure access.
How it works:
- User Requests Access: When a user tries to access Grafana, they are redirected to Azure AD for authentication.
- Redirect to Azure AD: Grafana sends the user to the Azure AD login page.
- User Authentication: The user logs in using their Azure AD credentials.
- Authorization Code: After successful login, Azure AD sends an authorization code to Grafana.
- Token Exchange: Grafana exchanges this code for an access token from Azure AD.
- Access Granted: If the token is valid, Grafana grants the user access and assigns them a role based on their Azure AD role.
This guide will walk you through the steps to install Grafana using Helm and configure Azure AD OAuth2 authentication.
1. Create the Microsoft Entra ID Application
1) Log in to the Azure Portal.
2) Click on Microsoft Entra ID in the side menu.
3) If you have access to multiple tenants, select the desired tenant from the upper right.
4) Under Manage, click App Registrations > New Registration.
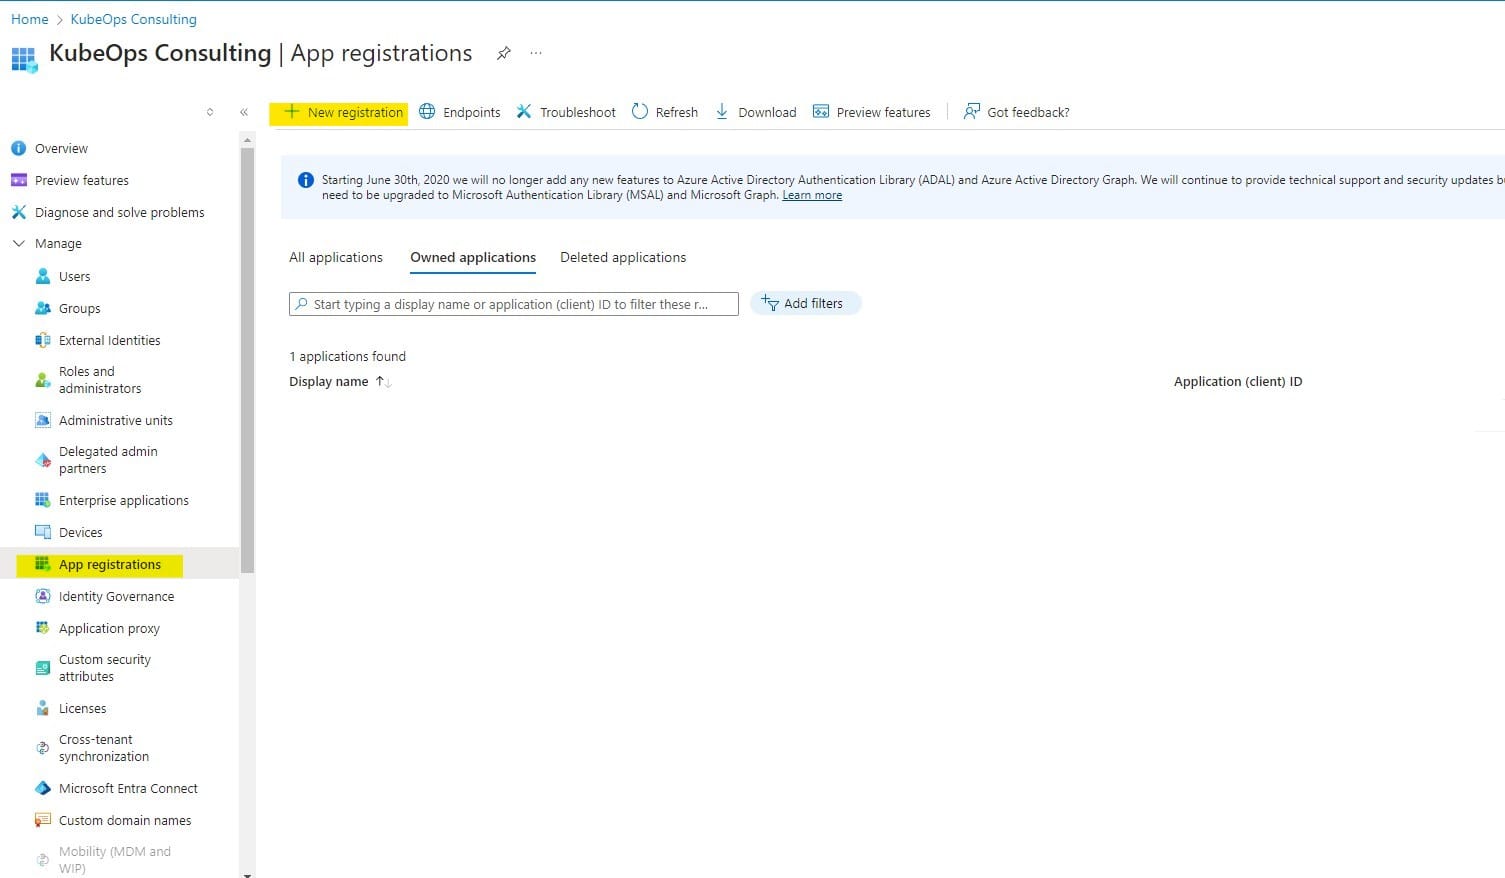
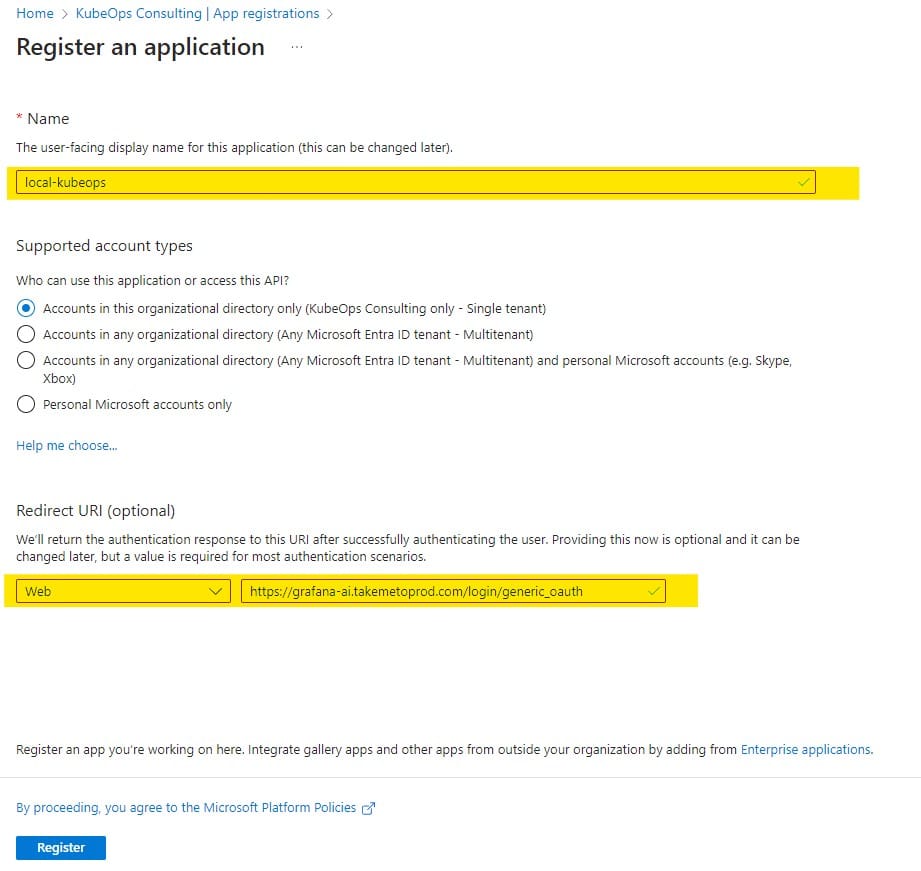
5) Enter a descriptive name.
6) Under Redirect URI, select Web.
7) Add the following redirect URLs:
https:://grafana-ai.takemetoprod.com/login/azureadhttps://://grafana-ai.takemetoprod.com
8) Click Register.
2. Configure the Application
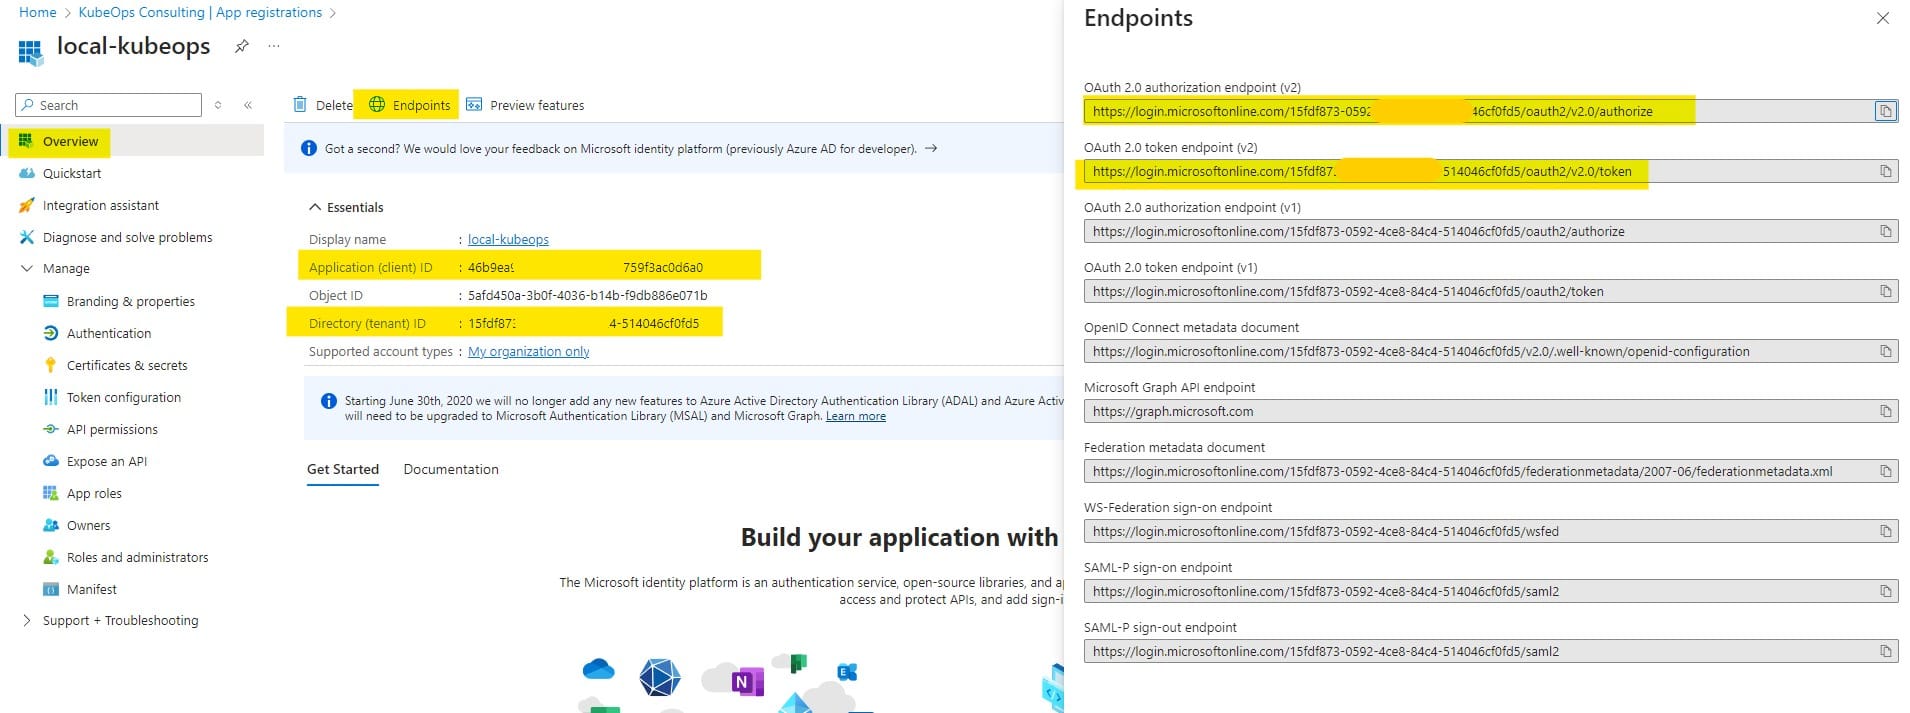
1) Note the Application ID (OAuth client ID).
2) Click Endpoints and note the OAuth 2.0 authorization endpoint (v2) URL and OAuth 2.0 token endpoint (v2) URL.
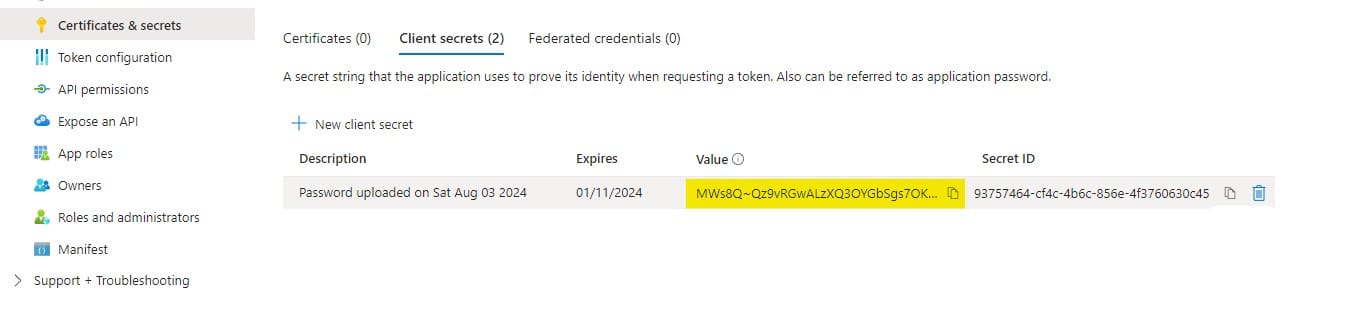
3) Click Certificates & secrets in the side menu and add a new client secret with:
- Description: Grafana OAuth
- Expires: Select an expiration period
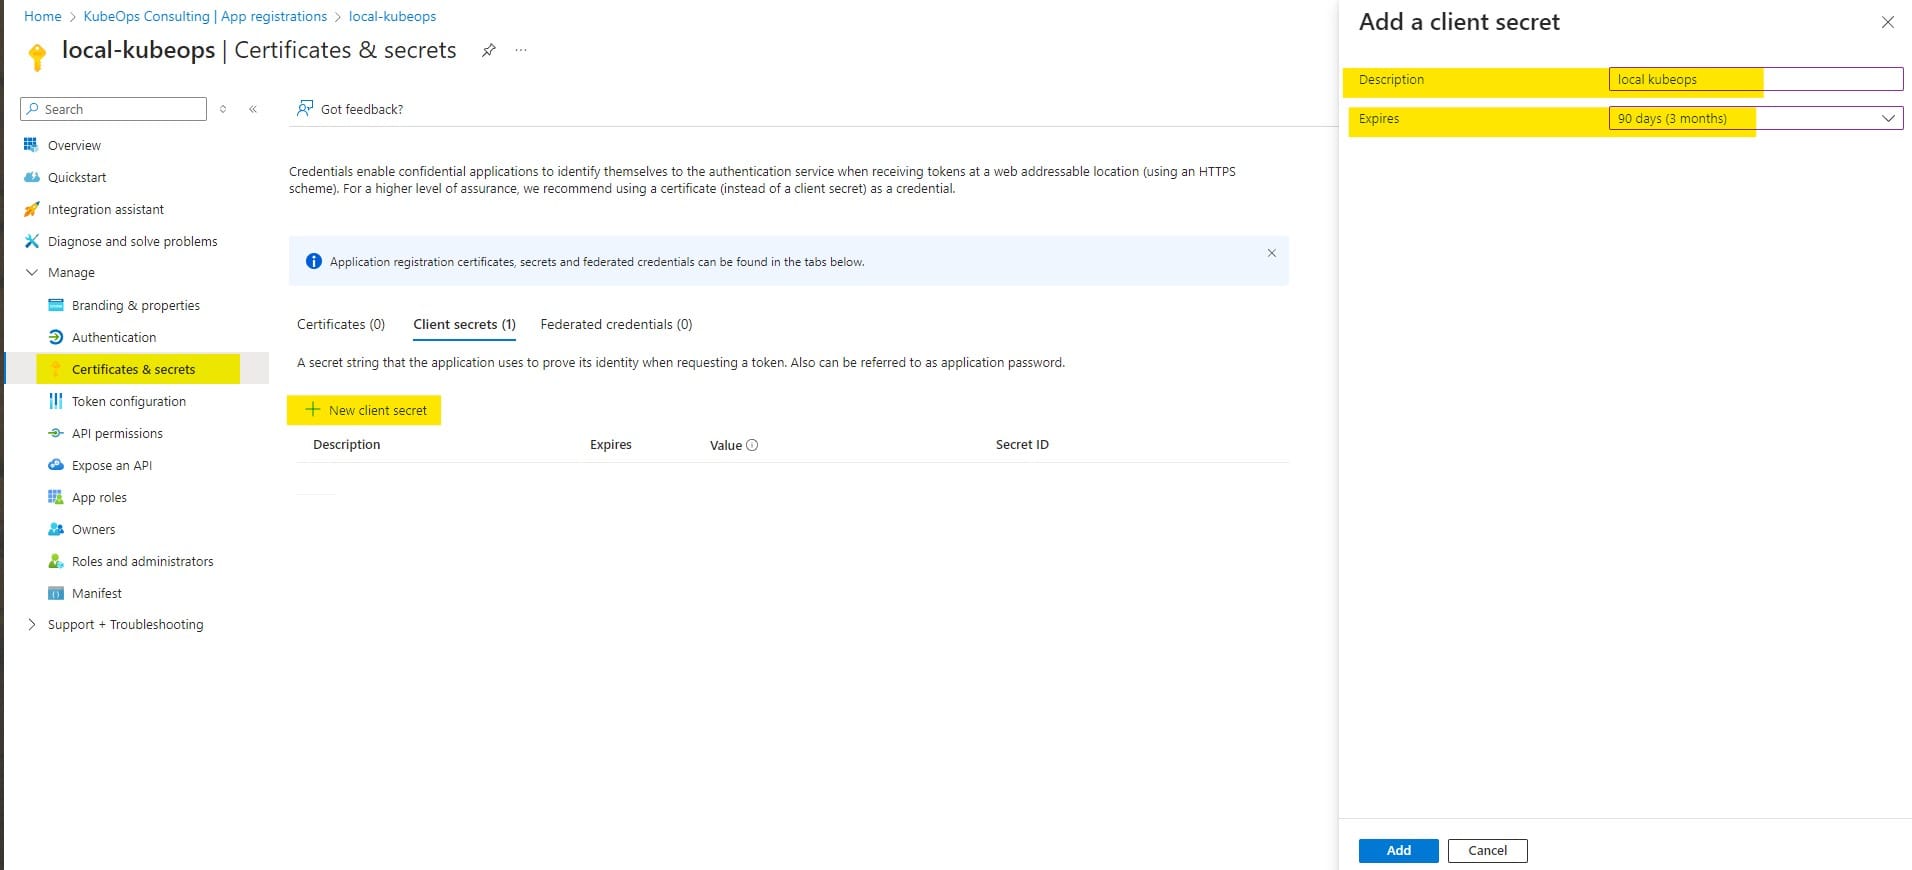
4) Click Add and copy the client secret value.
3. Configure Application Roles in the Manifest File
1) Click Manifest.
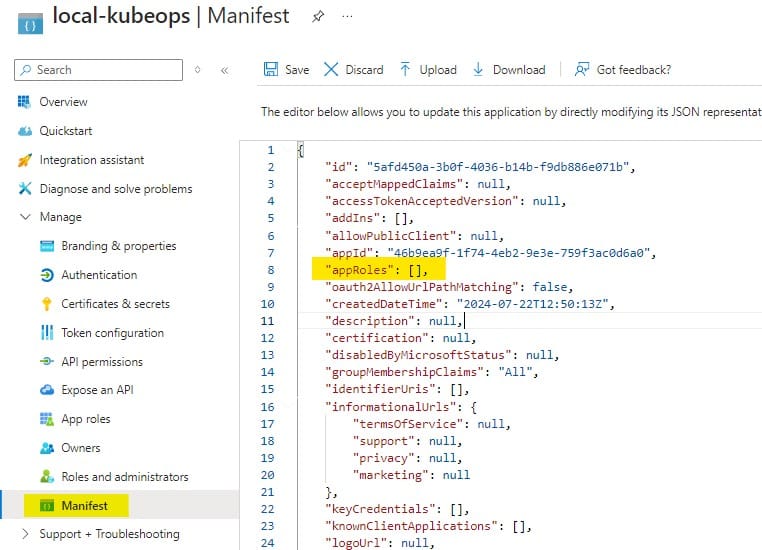
2) Go to “appRoles"
3) add the following JSON code.
{
			"allowedMemberTypes": [
				"User"
			],
			"description": "Grafana org admin Users",
			"displayName": "Grafana Org Admin",
			"id": "38d11d0d-a722-43e1-9ea3-f21c004f7127",
			"isEnabled": true,
			"lang": null,
			"origin": "Application",
			"value": "Admin"
		},
		{
			"allowedMemberTypes": [
				"User"
			],
			"description": "Grafana read only Users",
			"displayName": "Grafana Viewer",
			"id": "15f8ecc5-334a-4b14-924f-8ba2a11fce88",
			"isEnabled": true,
			"lang": null,
			"origin": "Application",
			"value": "Viewer"
		},
		{
			"allowedMemberTypes": [
				"User"
			],
			"description": "Grafana Editor Users",
			"displayName": "Grafana Editor",
			"id": "c20727cc-d5a1-4457-9060-fb6e98ed6026",
			"isEnabled": true,
			"lang": null,
			"origin": "Application",
			"value": "Editor"
		}
4) Click App roles (Now you can see “Grafana Org Admin" “Grafana Viewer" “Grafana Editor"

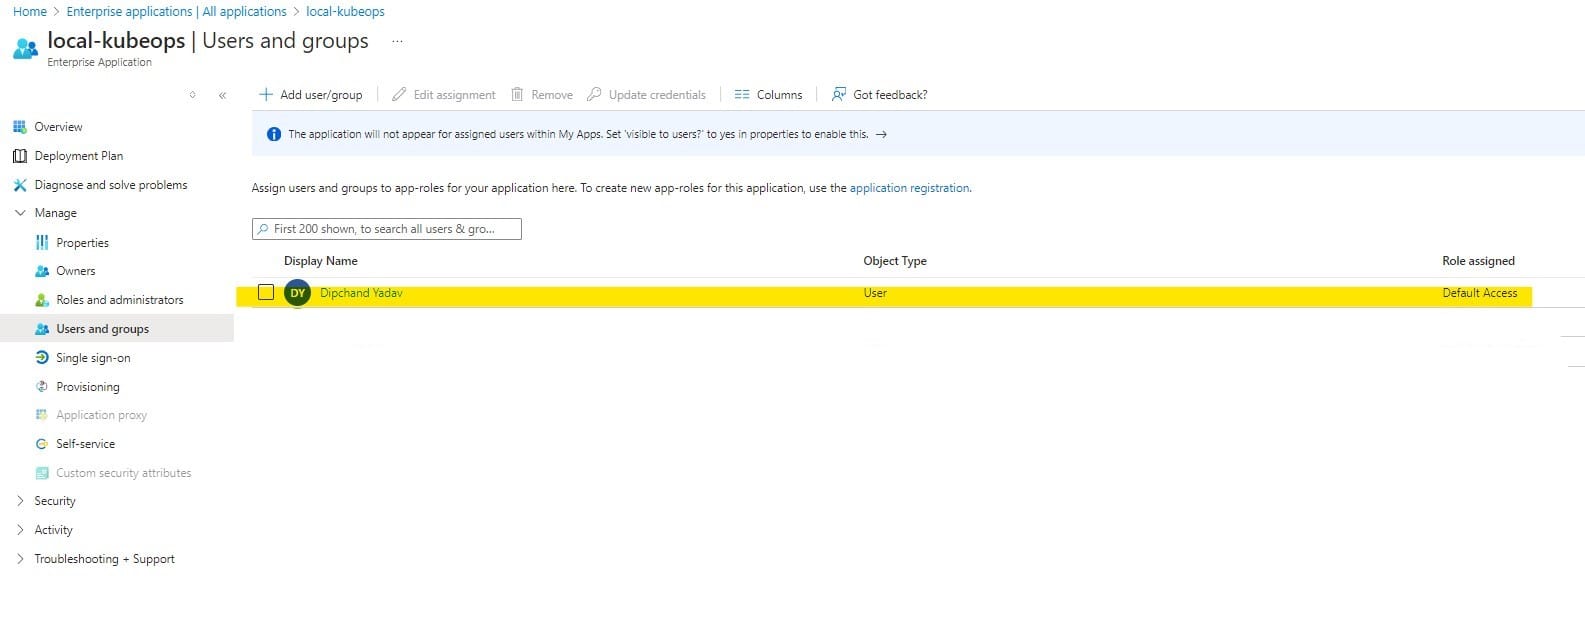
4. Define Application Roles
1) Go to Microsoft Entra ID > Enterprise Applications > Manage.
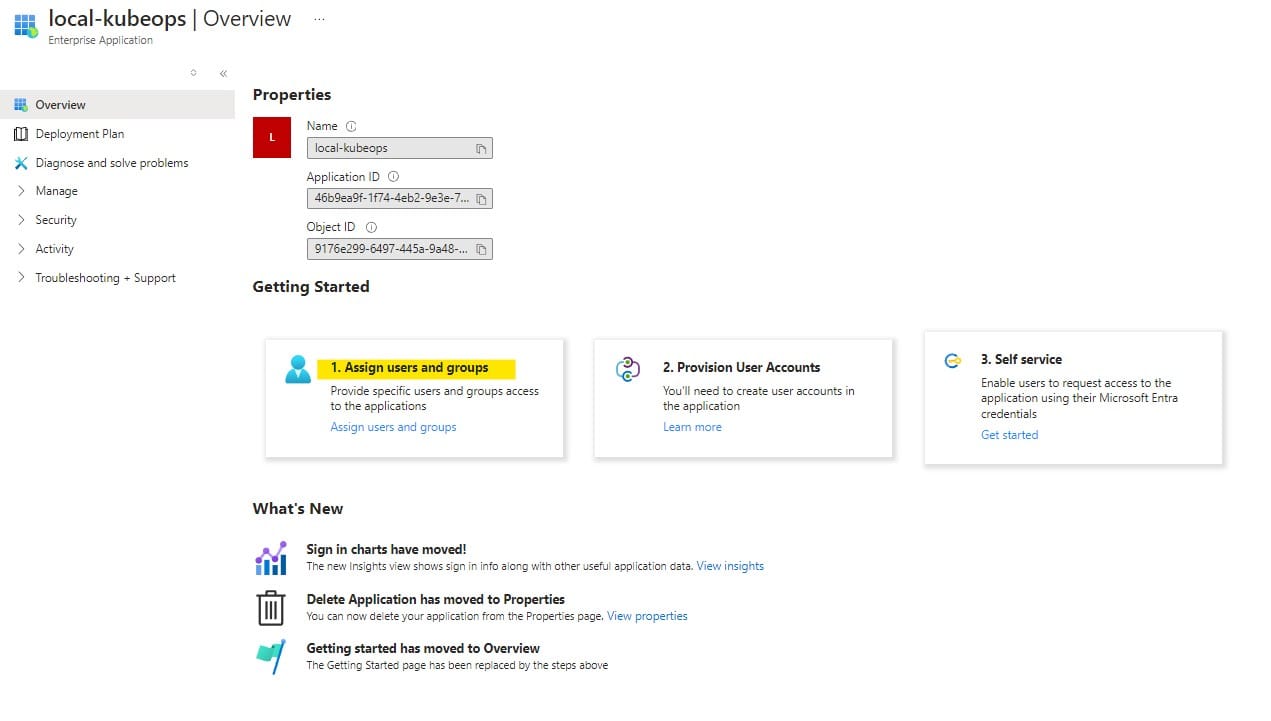
2) Please search for your application and click it.
3) Click Users and Groups and add users or groups to the Grafana roles.
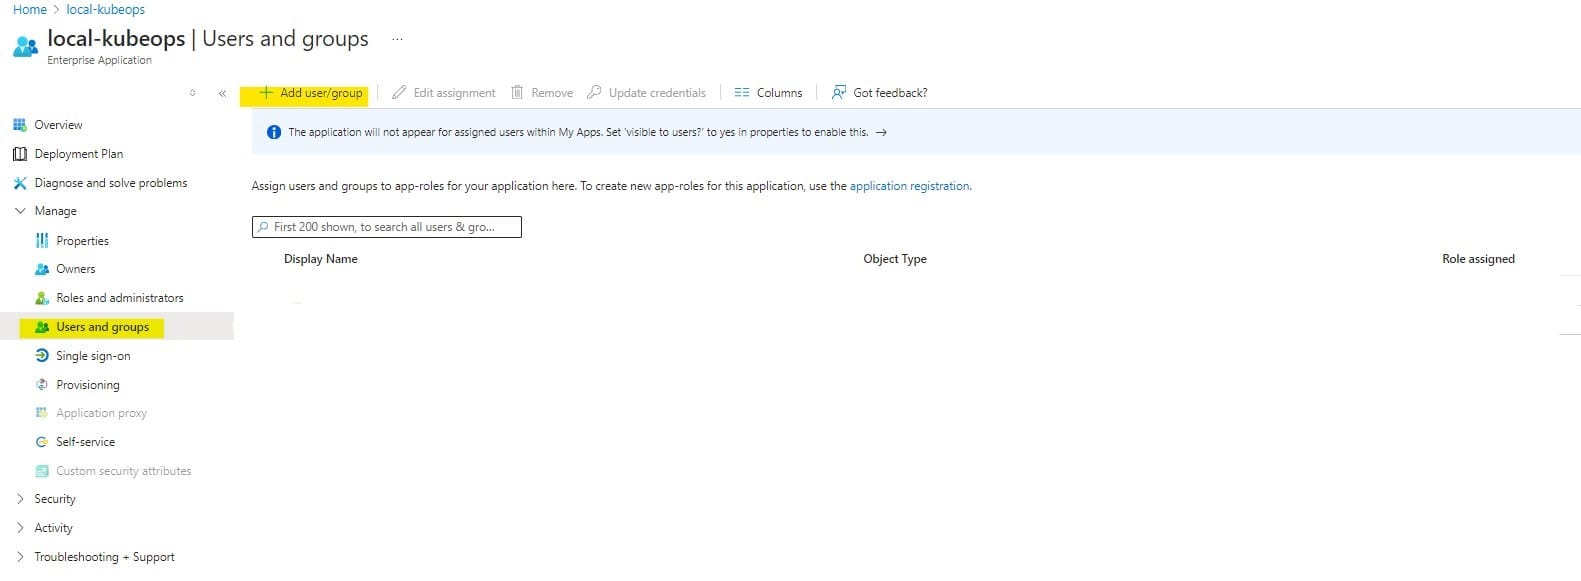
4) I have added dipchand as a user
5. Install Grafana Using Helmfile and Update grafana.ini Configuration:
repositories:
  - name: grafana
    url: https://grafana.github.io/helm-charts
releases:
  - name: grafana
    namespace: default
    chart: grafana/grafana
    values:
      - service:
          type: NodePort
          nodePort: 32000
          targetPort: 3000
          port: 80
   grafana.ini:
     server:
       domain: grafana-ai.takemetoprod.com
       root_url: https://grafana-ai.takemetoprod.com
     auth.generic_oauth:
       enabled: true
       name: AzureAD
       client_id: 46b9ea9f-1f74-4eb2-9e3e-759f3ac0d6a0
       client_secret: mGl8Q~cvbcbc-U1Vw1izo-8uaamyX-1gNCMx0bdrT
       scopes: openid email profile User.Read
       auth_url: https://login.microsoftonline.com/15fd-dfdgd-dsf89-fsdfsv-fsf8-fsdfsfdvd8/oauth2/v2.0/authorize
       token_url: https://login.microsoftonline.com/15fd-dfdgd-dsf89-fsdfsv-fsf8-fsdfsfdvd8/oauth2/v2.0/token
       api_url: https://graph.microsoft.com/oidc/userinfo
       redirect_uri: https://grafana-ai.takemetoprod.com/login/generic_oaut
       skip_org_role_sync: false\
     database:
       type: sqlite3
       path: grafana.db
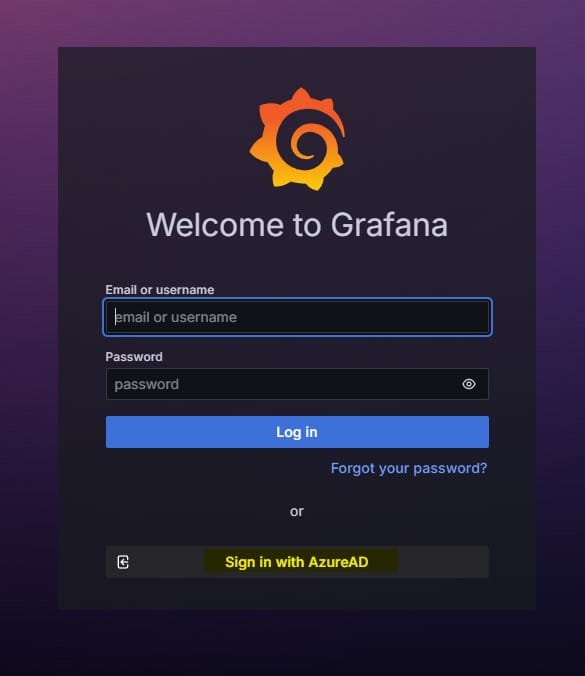
If the configuration is successful, you'll see an option to "Sign in with AzureAD" on the Grafana login page.
Summary
By following these steps, you will set up Grafana with Azure AD OAuth2 authentication, allowing users to log in using their Azure AD credentials.
Frequently Asked Questions
Can Grafana use Microsoft Entra ID (Azure AD) authentication?
Yes. Grafana supports Microsoft Entra ID (formerly Azure Active Directory) using OAuth2 authentication, allowing teams to enable secure Single Sign-On (SSO) access.
Why should I use Azure AD OAuth2 authentication with Grafana?
Azure AD OAuth2 centralizes authentication, improves security, simplifies user management, and enables enterprise-grade access control.
Can Helmfile manage Grafana OAuth configuration?
Yes. Helmfile allows you to declaratively manage Grafana configuration, including OAuth settings, secrets, and deployment values.
What redirect URI should I configure for Grafana Azure AD authentication?
A common redirect URI format is:
https://your-grafana-domain/login/azuread
Ensure the URI exactly matches the value configured in Microsoft Entra ID.
Can I assign Grafana roles from Azure AD groups?
Yes. Grafana supports role mapping, allowing Azure AD groups to map users to Admin, Editor, or Viewer permissions.
Is OAuth2 authentication more secure than local Grafana login?
OAuth2 improves security by centralizing authentication, reducing password management overhead, and enabling enterprise identity controls.
Can Kubernetes-hosted Grafana use Azure AD OAuth2?
Yes. Grafana running on Kubernetes can integrate with Azure AD OAuth2 using Helm charts or Helmfile deployments.
What happens if Grafana OAuth login fails?
Common causes include incorrect redirect URIs, invalid client secrets, permission issues, or incorrect OAuth endpoint configuration.
Read More
- How Does SAML Authentication Work?
- Authentication With OAuth2 Proxy and NGINX Ingress on Kubernetes
- Cloudflare Tunnel Explained: Secure Reverse Proxy Without Opening Firewall Ports
- What Actually Happens When a Kubernetes Pod Reaches the Internet
- Your Kubernetes API Is Public — Here’s How to Make It Private
- Kubernetes IP Whitelisting Explained